Upcoming Changes to NIST Handbook 105-1 Requirements for Class F Calibration Weights

Beginning January 1, 2020, Class F calibration weights will no longer be sold for legal metrology use. According to the newly updated NIST Handbook 105-1 (2019), new weights for use as field standards placed into service for weights and measures use after this date must comply with all of the requirements of NIST Handbook 105-1 (2019).

In order to update our Class F inventory to bring it more in line with ASTM and OIML tolerances, all Rice Lake NIST Class F weights will become ASTM Class 5 weights. Part numbers and pricing will remain the same, but the tolerance will be tighter.
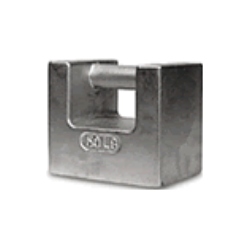
nist class f test weight

Note that existing NIST Class F calibration weights in the field are grandfathered in and may continue to be used for legal metrology use, but they must meet NIST Handbook 105-1 (1990) requirements. Although the new revision does supersede the 1990 version, it makes clear that existing Class F weights may continue to be used.

While existing NIST Class F calibration weights may be reclassified to one of the new specifications if all specifications and tolerances fully comply with the alternative standard, the NIST Office of Weights and Measures strongly recommends that you do not reclassify existing Class F weights due to the difficulty of performing compliance evaluation.

This change is taking place to accommodate for the increasing accuracy of weighing devices used for legal metrology. Class F weights are no longer sufficient for the calibration, inspection, or sealing of weighing devices used for the jewelry, marijuana and pharmaceutical industries. Similarly, hydrogen for hydrogen vehicles is being sold by weight, which demands a high level of accuracy.

We are here to help guide customers to select the right calibration weight for each application; however, selection is ultimately based on the customer’s unique needs and requests.

Feel free to contact us with any questions about the NIST Class F legal metrology change in Handbook 105-1 or questions regarding where to buy calibration weights. Call (919) 776-7737 

Inspecting and Testing Heavy Duty Truck Scales

At Central Carolina Scale in addition to selling and installing truck scales; we also check, test, adjust, and calibrate truck scales just about every working day of the year. We have factory trained technicians who can troubleshoot even the smallest problem areas like a load cell that might be creeping. We also have certified test weights and a weight cart which allows us to provide the highest level of truck scale service available in North Carolina. When we’re finished doing our scale check, we supply the customer with documentation that shows before and after readings and how much weight we tested the scale with, etc…

However, in quite a few cases, where money changes hands based on scale weight, the state of North Carolina will also check the customer’s truck scale to make sure it is weighing correctly and performing within legal for trade tolerances. The blog post linked below is a field trip that describes a state test in more detail.

The Standards Division checks any scales where “money changes hands.” This would include scales at grocery stores, livestock scales, buffets, agricultural-supply centers, highway patrol weigh stations and scrap metal facilities. Scales are checked on an annual basis or by complaint. The only exception is stockyards, which are checked twice a year.

When consumers bring unwanted appliances, metal debris or even old vehicles to a scrap metal facility the items are generally weighed on a truck scale. At some facilities, this scale can record up to 100,000 pounds of weight. The entire weight of the vehicle, trailer and scrap metal is recorded on the scale. After unloading inside the facility, the consumer then drives the emptied vehicle and trailer back over a scale at the exit and this weight is recorded. The consumer is paid for the difference of the two weights. Depending on the amount of scrap brought in, the amount could be a couple of hundred dollars.
weight cart testing scales

To check a heavy truck scale, Inspector Glenn Farmer uses a six-wheeled, gas-powered, steel test cart. A hydraulic arm is used to fill the cart with certified 1,000-pound and 500-pound weights. For the test, he uses a known weight (the cart plus added weight) and test different quadrants of the scale. A five-section scale would have 18 different test points. There are two different types of truck scales, mechanical and load. To test a mechanical scale, Farmer must move his cart side to side to record weight. To check the accuracy of a load scale, he moves the cart down the center of the scale.

The Standards Division uses National Institute of Standards and Technology guidelines to determine tolerance levels on the scales. A tolerance level is the amount of weight a scale is allowed to vary. For a scale that can measure more than 25,000 pounds of weight, the tolerance level would be 60 pounds. A scale that does not pass inspection must be pulled out of service until the facility fixes the problem. “Many times the issue is debris buildup in the crevices of the scale,” Farmer said. “Pine straw, cans and other debris can cause the scale not to weigh correctly.

Our advice to the company is to power wash or use an air hose to clean the area around the scale.” If the scale is still recording incorrect weights after cleaning, the facility may call a scale calibration company to fix the problem. Some facilities will have a representative from their scale company go along with the standards inspector on the day of their inspection. This means that most problems can be fixed immediately, and the facility doesn’t have to endure a prolonged shutdown of a scale if problems are found.

This was a nice write up about testing scales and how important it is to keep your scales weighing accurately. It’s always a good idea to keep your scales clean and weighing as accurate as possible, year round. One easy way to do that is to contact us at (919) 776-7737 and set up a maintenance schedule for your scales. You’ll save money and you will have accurate scales with the regular scale checks.

Weight Tolerances

Recently, I was informed of a situation that involved a digital infant scale and a “test weight” also known as a 5 pound consumer barbell weight. Apparently, the barbell weight was used to check the digital scale and it was thought that the scale had not been calibrated correctly due to a scale readout of 5.2 lbs.

Actually, consumer barbell weights like those used in the above scenario are manufactured to tolerances between +/-1% and +/-7%, a significant range of tolerance as compared to NIST certified test weights. Using a consumer barbell weight with a wider manufacturing accepted tolerance than the scale may result in a scale display reading that seems inaccurate. A +/-5% tolerance on a 5 pound consumer barbell weight means the weight can weigh from 4.75 lb to 5.25 lb and still be sold as a 5 pound weight. Compare that to a 5 pound NIST Class F weight which is manufactured and adjusted to within +/-230 mg tolerance. In the example above, the user contesting the calibration accuracy of the digital scale checked their consumer barbell weight again, this time on a certified Legal for Trade scale and found that it weighed 5.2 pounds, meaning the digital scale was correct.

We recommend using NIST certified Class F Sealed manufactured test weights in most applications to check or calibrate medical scales and industrial scales.

Best Practices For Calibration Test Weights

Rice Lake’s Metrology department has retained its world class reputation through its highly trained staff and adherence to stringent handling procedures–from receiving, to calibrating, to shipping. The information below from Rice Lake highlights the standard procedure that they use upon receipt of your test weights. Here you’ll also find the best practices that Rice Lake recommends for handling weights and standards to help you maintain the best quality and integrity of your weights.

Recommended shipping procedures for weights
Ship weights in cases and materials designed to withstand and repel the abuses of shipping.
Packaging peanuts should not be used with weights, as this type of packaging clings to the weights creating static electricity which can compromise the lab environment.
Alternative packing material is recommended as follows:
Styrofoam (not peanuts or smaller pieces)
Paper (not shredded as this also conducts static electricity)
Bubble wrap
Loose small weights should have crumpled paper (not shredded) packed soundly in between all weights and box.
Clean room cases should only be used for weight storage and are not recommended for the shipment of weights.
Shipping of heavy weights (10 lb or larger) in cardboard boxes is not recommended.
Larger weights should be individually wrapped or protected, supported with stiff packing material and double boxed for structural durability.
Small weight kits should be held shut with secure latches, rubber bands, or tape, and placed inside boxes or bags.

Rice Lake Weight Handling Procedure
All weights and cases are inspected for damage and scheduled for calibration upon arrival to the lab.
All stickers and marker are removed from the weights.
Precision weights receiving NVLAP Calibration are checked for magnetism.
A tolerance test is conducted.
Any follow up with the client is completed.

Required Standards Conditions
* All delivered standards to this laboratory are required to arrive with the following conditions:

All weights should be clean and in good repair.
Any cleaning, repair, or painting of standards in the metrology lab will incur an extra charge.

Mass Standards
Weights should be clean and in good repair.
Weights shall be identified with a permanent serial number or mark into the surface of the weight.
Stickers and marker are not allowed and will be removed. The added mass of the sticker may change the mass of the weight, possibly causing the weight to be out of tolerance which will invalidate the reported value on the certificate.
Individual weight kits shall also be identified with unique serial numbers.
Cast iron weights should have no evidence of rust, loose paint or adhering debris.
Analytical weights should be handled carefully. Tolerances are small, so dirt or abuse can throw them out of tolerance.

Cases
Interior of cases for weight kits should also be wiped out or vacuumed.
Cases should be sound with secure latches.

Checking and Calibrating Scales with Certified Test Weight

Checking scales with certified test weights is an important part of the overall service and calibration plan for both industrial and retail scales. The test weights used to check the scales are very accurate and are tested by the state laboratory at certain intervals to make certain the test weights are accurate and to make sure the scales that those weights are used on are tested and calibrated correctly. This scale check not only helps the company but also the consumer to make sure they are buying or selling the correct amounts of product. However, there are always going to be those who take shortcuts. Continue reading

Test Weights And Boats

A customer recently mentioned having an odd question to ask.  His firm does stability testing on boats and ships, and has rented 1000lb NIST Class F Cast Iron Test weights in the past.  He was looking to do a similar test in the U.S. Virgin Islands and having problems finding a local vendor for test weights.

Curious, we asked what exactly do you use the weights to test?  Normally around here, the weights are put on a truck scale for a yearly calibration or to test a floor scale out.  The customer said, he does stability testing on ships and other small craft such as yachts. With larger ships, large blocks of concrete (which are weighed before the test) are often used; however with smaller vessels where deck space is tight, your 500, 1000 and sometimes 2500 lb test weights are ideal and are easy to handle.

They have the added benefit of being certified weights, thus there is little question about accuracy. On some smaller vessels they used the 50lb weights and moved the weights by hand during the test. Basically the test weights are placed on board and then moved transversely from side to side to apply a known moment as the heel angle is measured. Using the principles of naval architecture, the vertical center of gravity is then calculated.